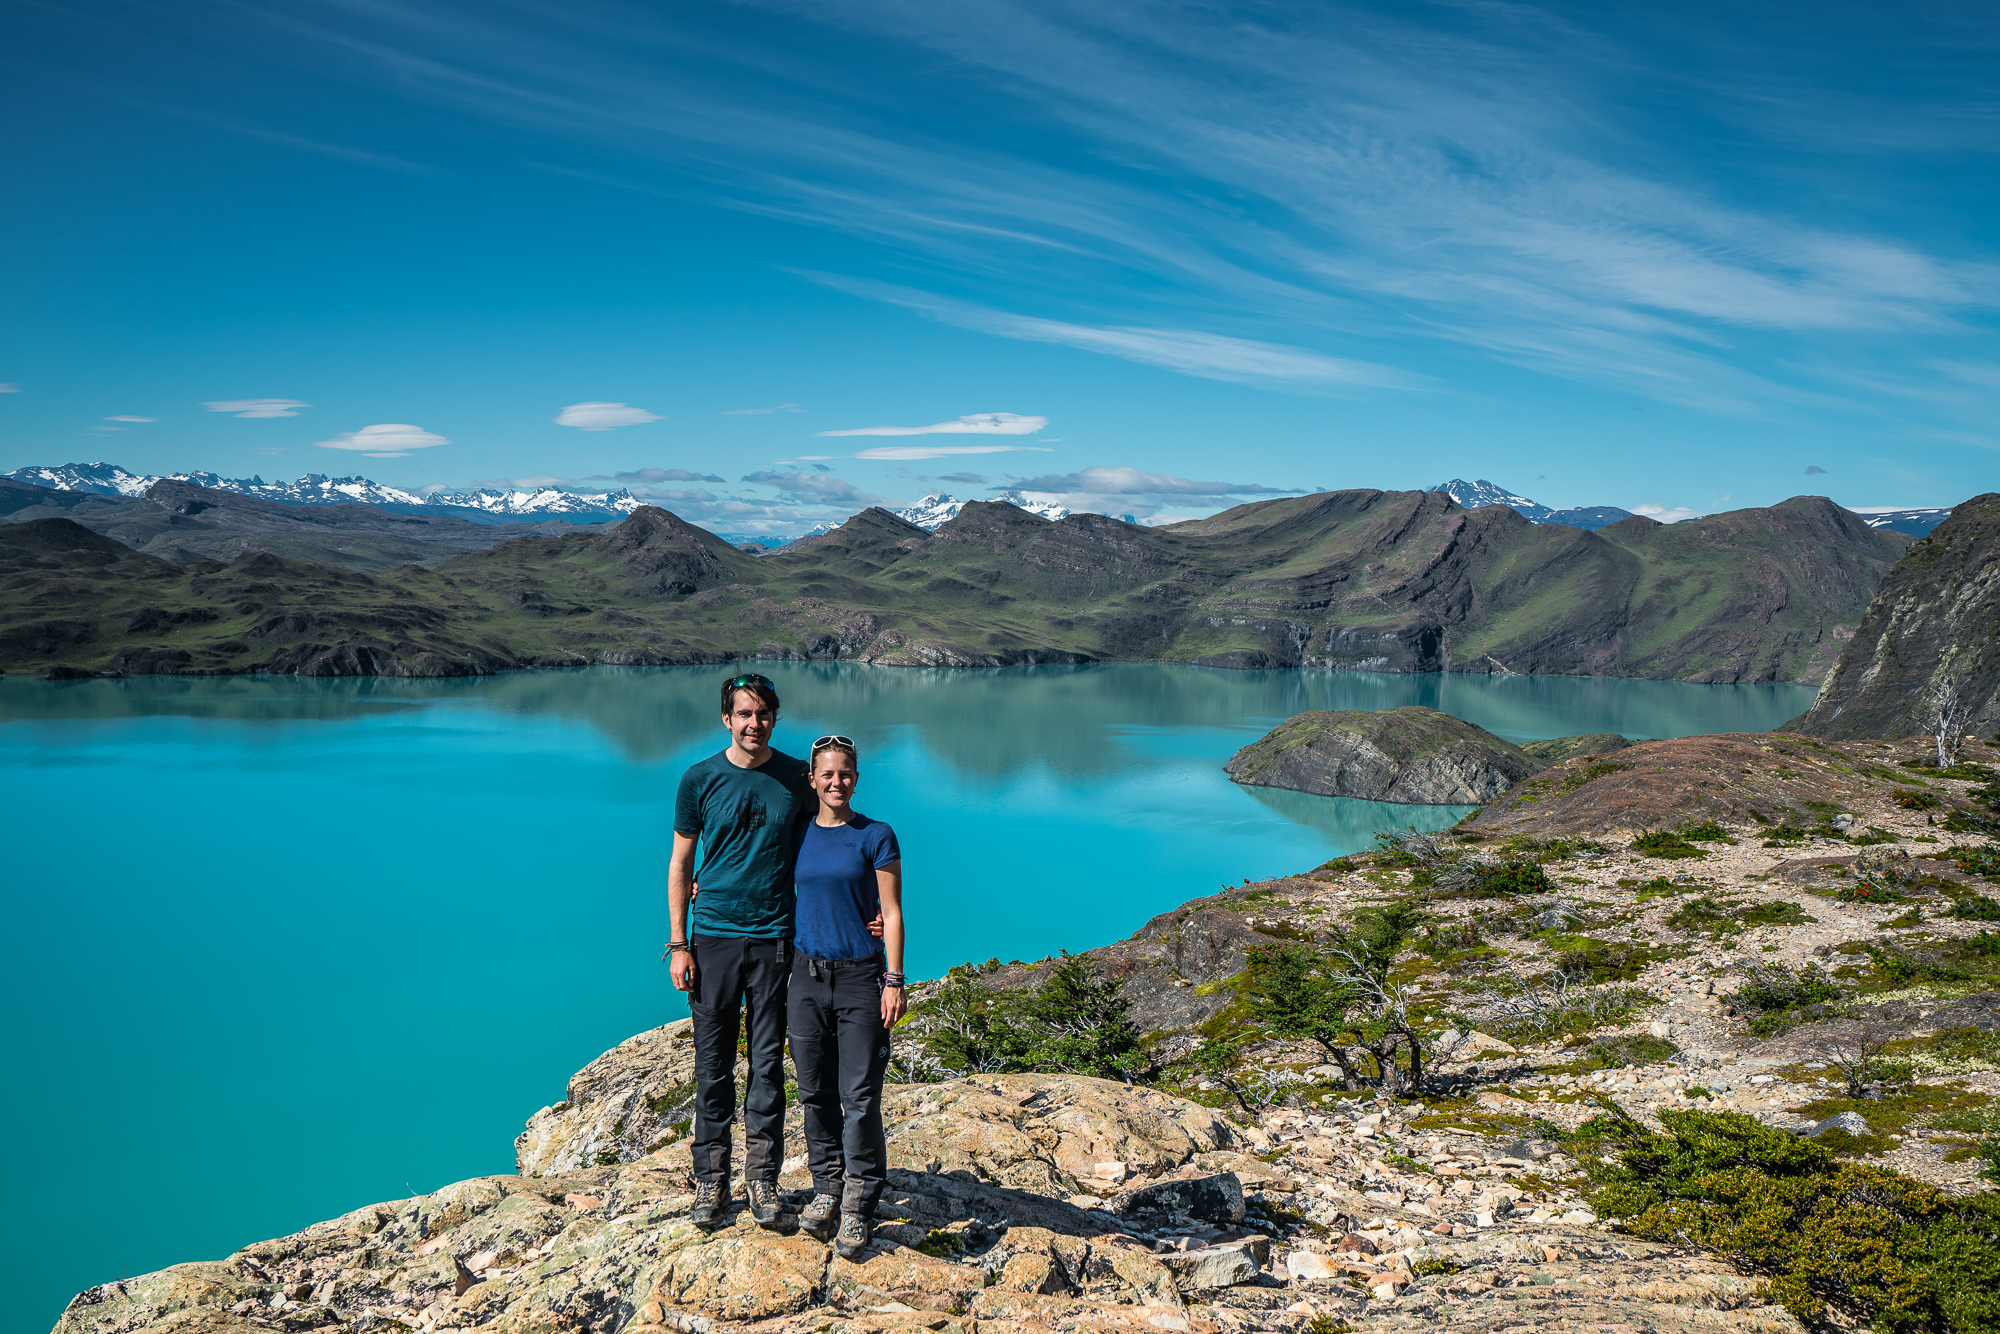
Hiking in Patagonia. This was a dream of Mirko and me for a long time. Once we reached Chile, our excitement about finally being close to the iconic ridge-lines and satellite peaks of the Patagonian mountain ranges grew stronger. Knowing that December and January are high-season months in Patagonia, we reached the Southern parts of Chile in late November, just before the number of tourists peak.
We hiked the popular W-Trek in Torres del Paine National Park between November 24th 2018 and November 28th 2018. If you plan to visit this magical place soon, I hope to be able to give you some advice in this blog post.
To start with, if you are up for hiking in Torres del Paine, you will for sure be visiting the small city of Puerto Natales. Located in the Magallanes and Antártica Chilena region, it is the place where everyone embarks on their adventure in the famous National Park (NP) Torres del Paine.
If you think that Puerto Natales is also the place where you organize your adventure in Torres del Paine NP, we have to disappoint you. It is most certainly not. Actually, everyone (or everyone who does not want to spend more than one thousand dollars for an organized tour or does not want to be super spontaneous about being able to hike in the park or not) has to plan his / her stay at least two (or better more) months ahead. And this is in our view also the most difficult part of the whole adventure. As so many people want to visit this park, camping spots and permits are very limited. (The Internet says that park averages around 252’000 visitors a year, of which 54% are foreign tourists.)
You may think, what do all those people actually do in the NP? Well, basically there are two famous treks: the W-Trek (5 days) and the O-Trek (8 days). The third option is the less famous Q-Trek (9 to 10 days). (Get more technical information about those treks online; here or here).
As there is a huge run on all campgrounds along these three treks, the earlier you reserve the campgrounds online, the better. From our experience I can say that we started our research about the trek only in August and we felt, we were a little late. Also, we were not always connected to the Internet and realized just a few days too late that the reservation systems for some campgrounds are open to public. So we missed the most popular campsites and struggled for a while to define our route. But finally, after many hours of tedious re-arranging, number crunching and pressing the refresh button, we managed to reserve four nights in the park along the route of the W-Trek.
What is most confusing about the reservation process, is that there are three players that host the different campgrounds in the park. And they, of course, all have different reservation systems and processes:
- CONAF, Chilean National Park – sells the obligatory digital park entrance for the entire hiking duration and at the same time runs the most basic (free) campgrounds in the park
- Fantástico Sur – runs some private campgrounds as well as mountain lodges in the park
- Vertice – runs some private campgrounds as well as mountain lodges in the park
This image gives you an even better idea, which campground has to be booked on what platform.
Depending on the route you chose, you have to contact all three operators. As they do not synchronize openings of their reservation systems, it needs a lot of time and patience for organization. But even if it sucks, just do it and deal with those extra hours (that you would be spending otherwise, maybe drinking beer!?). It is really worthwhile. This trek was definitively the highlight of our time in Chile!
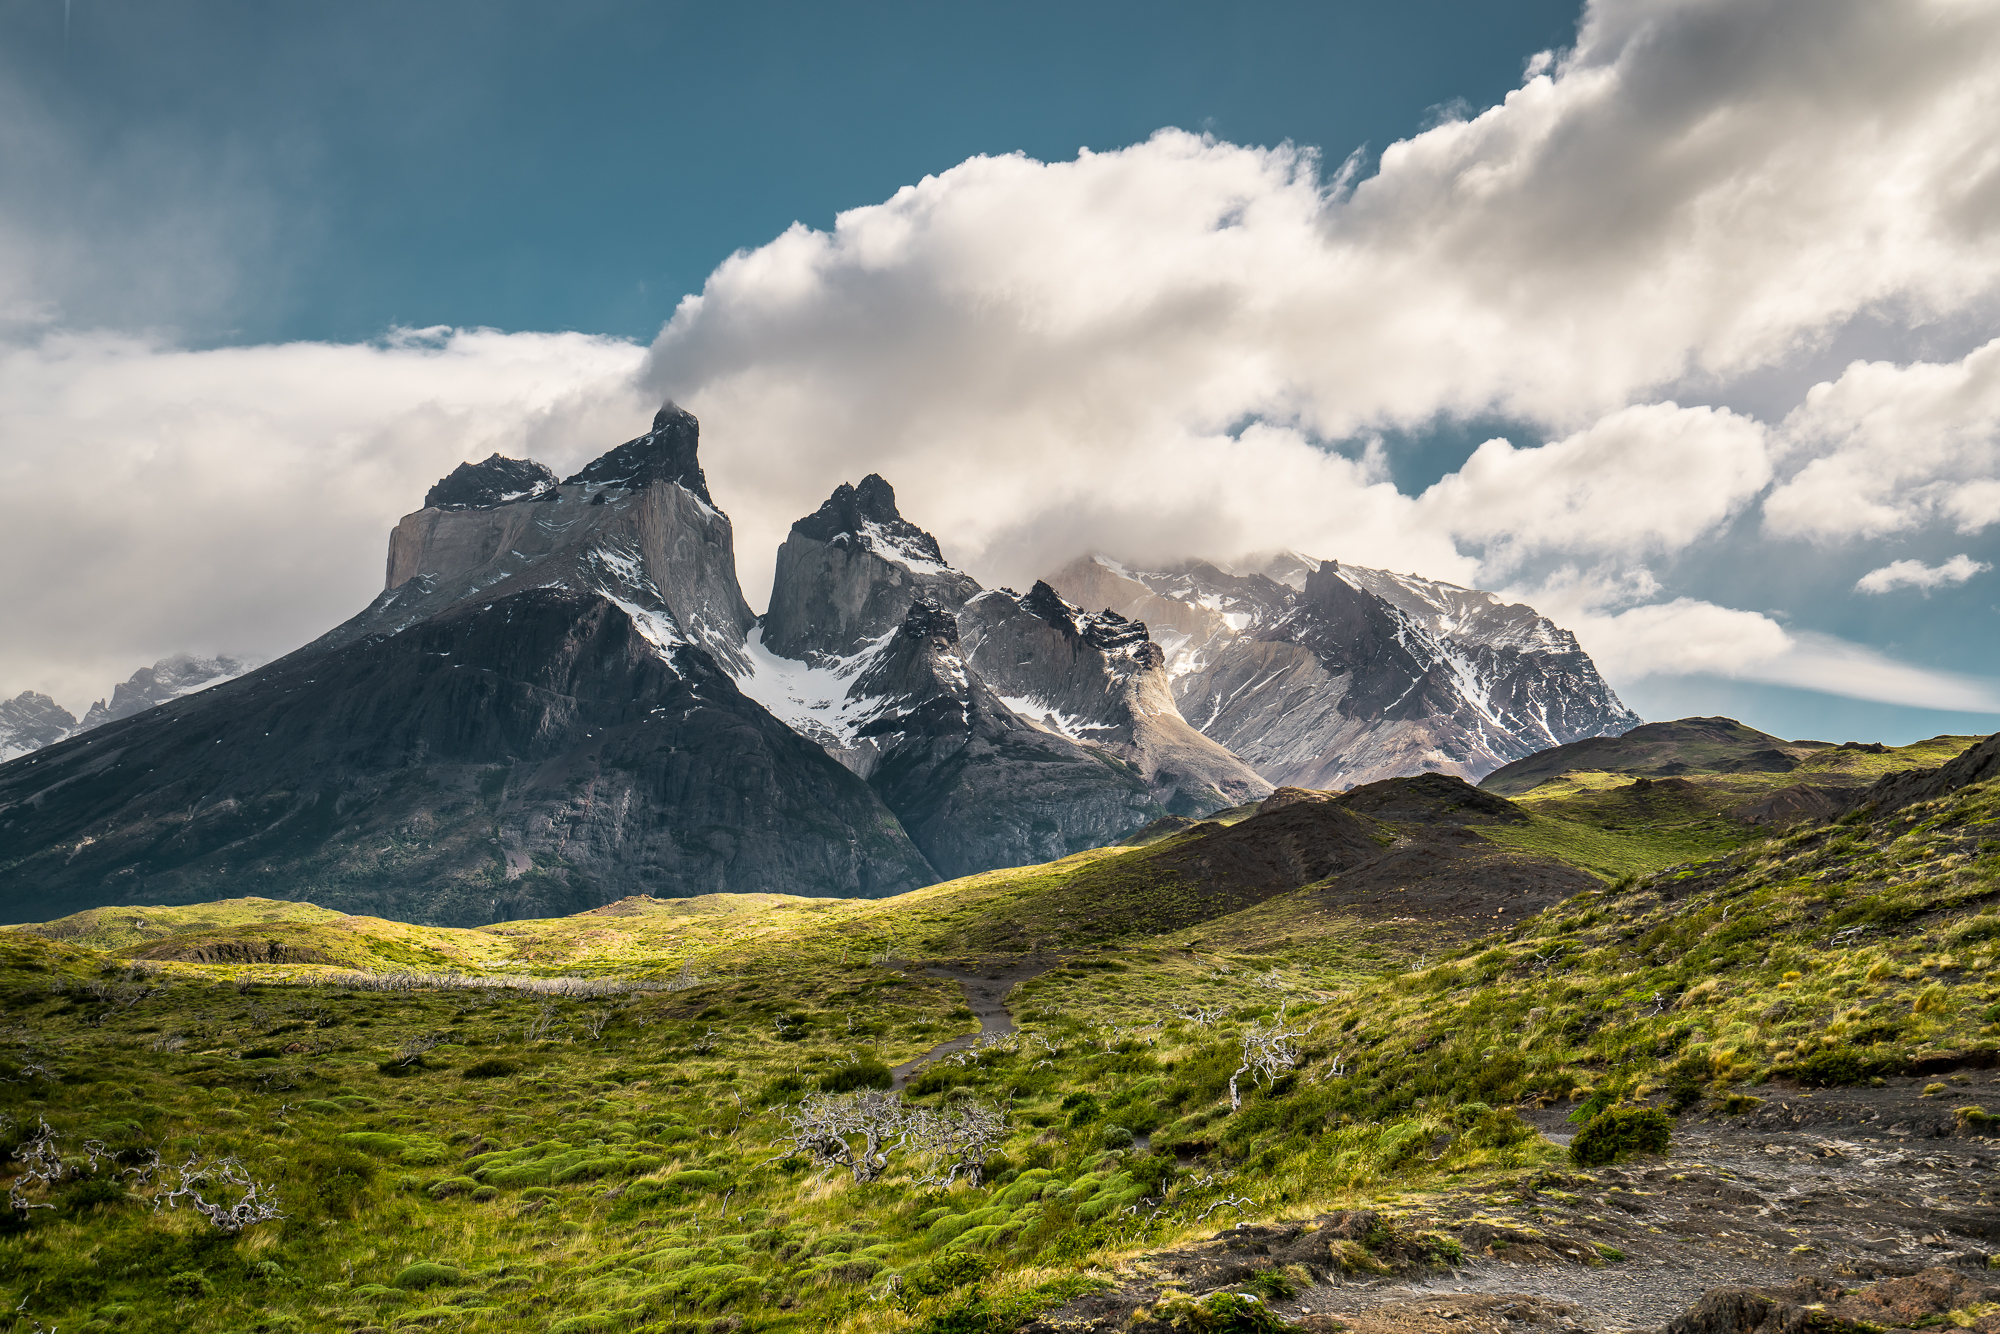
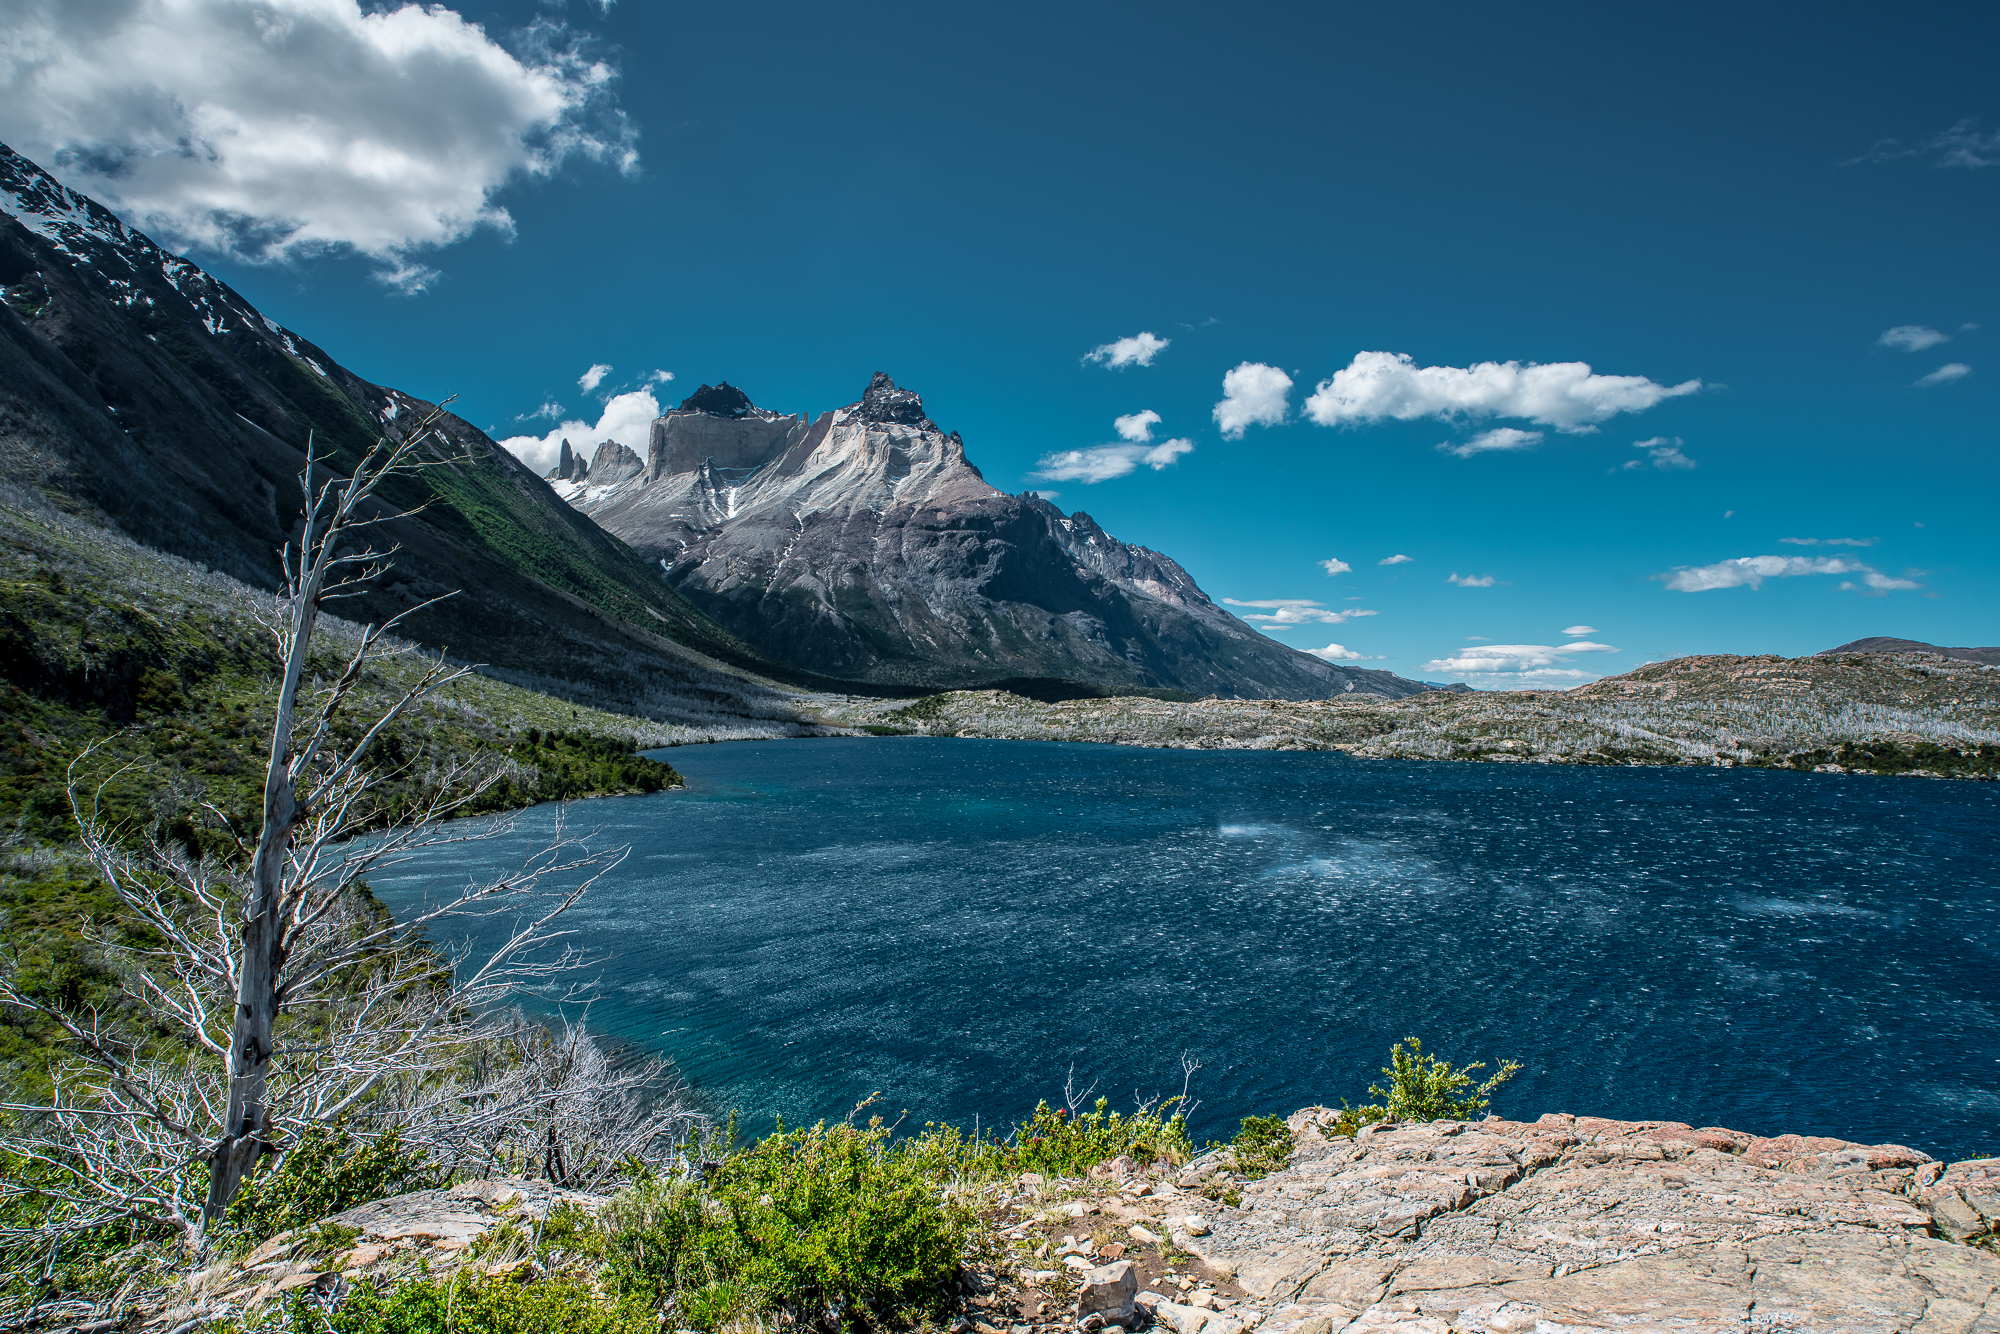
In the following, you will find a brief summary of how we did the W-trek, accompanied with some suggestions what you could improve for your adventure, or what we found to be of extra help. I will also share some pictures that Mirko took while hiking to illustrate how truly beautiful the four different vegetation zones (Patagonian steppe, the Pre-Andean shrubland, Magellanic subpolar forests and Andean Desert) in the NP are.
Recommendation Day 1
Our route: Paine Grande – Campamento Refugio Grey
Recommended route: the same
- Take the public bus from Puerto Natales to Catamaran Laguna Amarga at 7:10 am. Reserve the bus ticket at least one day before.
- The ferry at the final bus station brings you to Paine Grande at around midday. Note that even if you don’t like it, queue up early enough to catch the first ferry. (We missed the first ferry as we walked to a waterfall close to the bus stop and had to wait for another hour. This was a «pain(e)».)
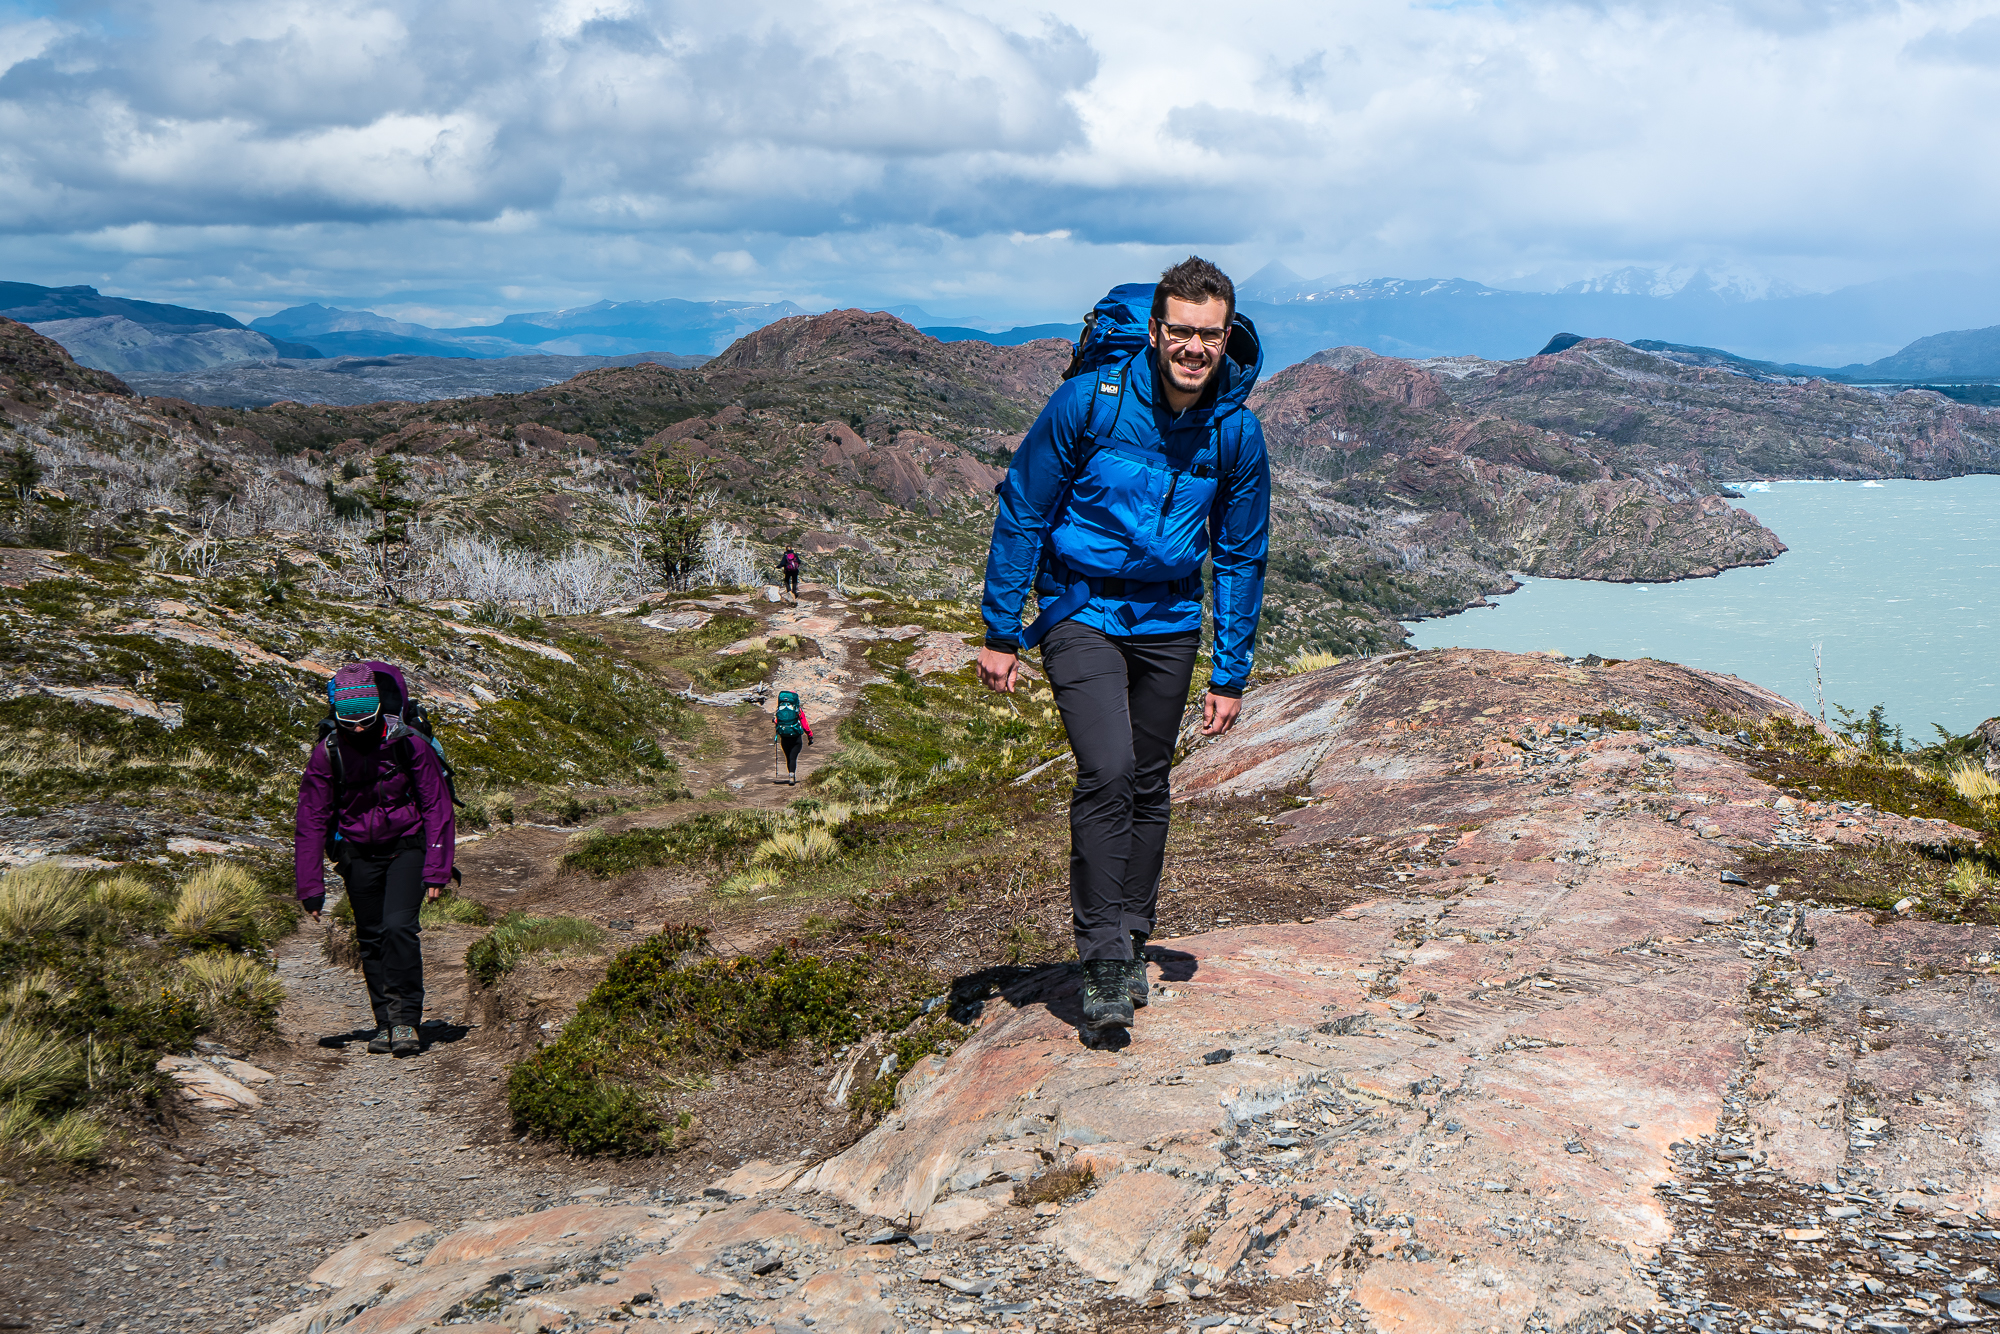
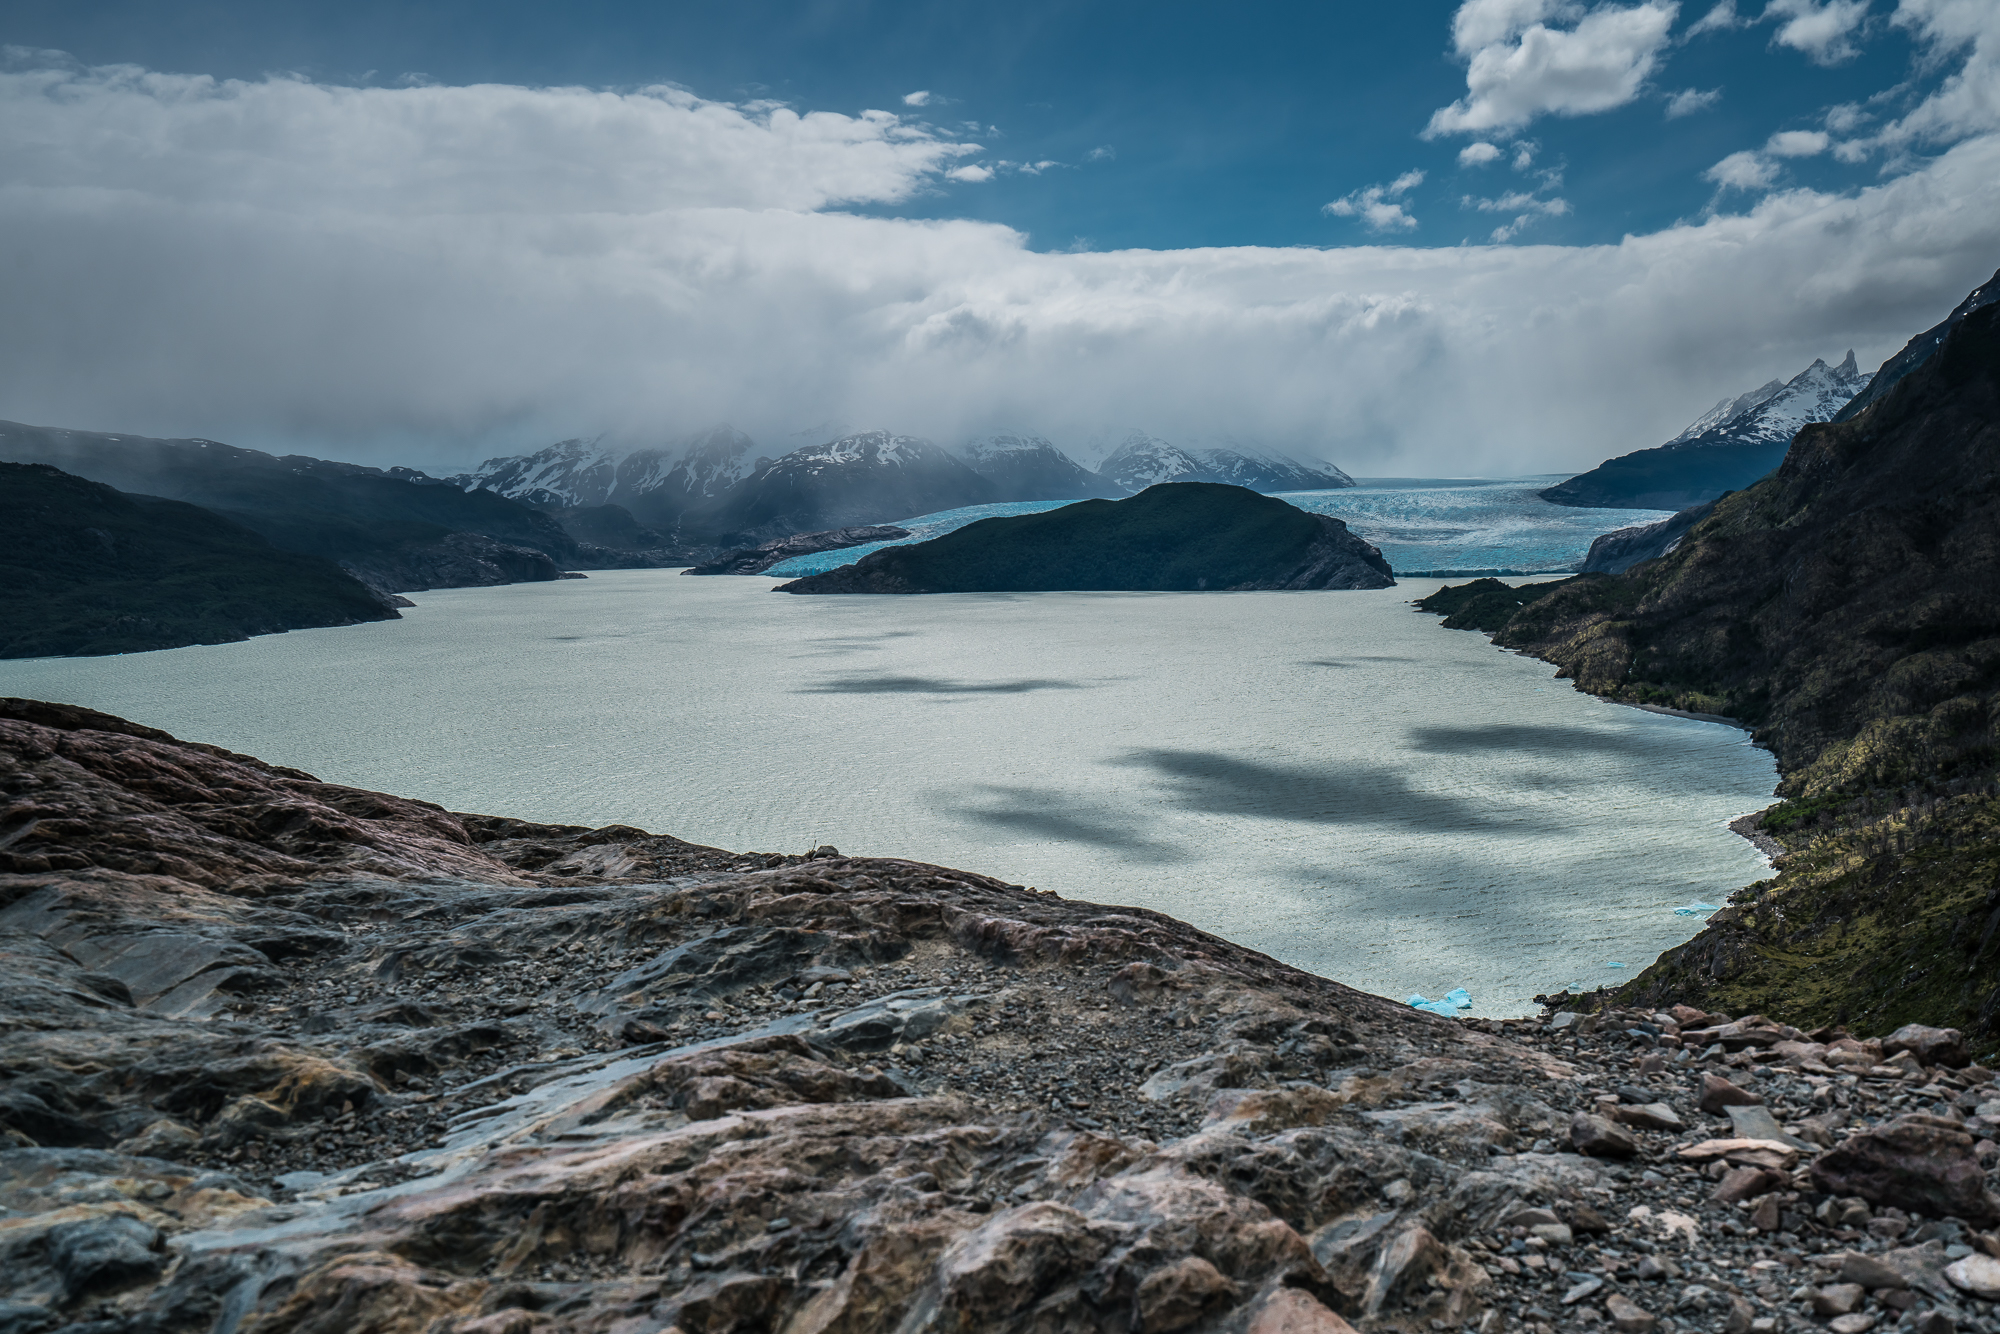
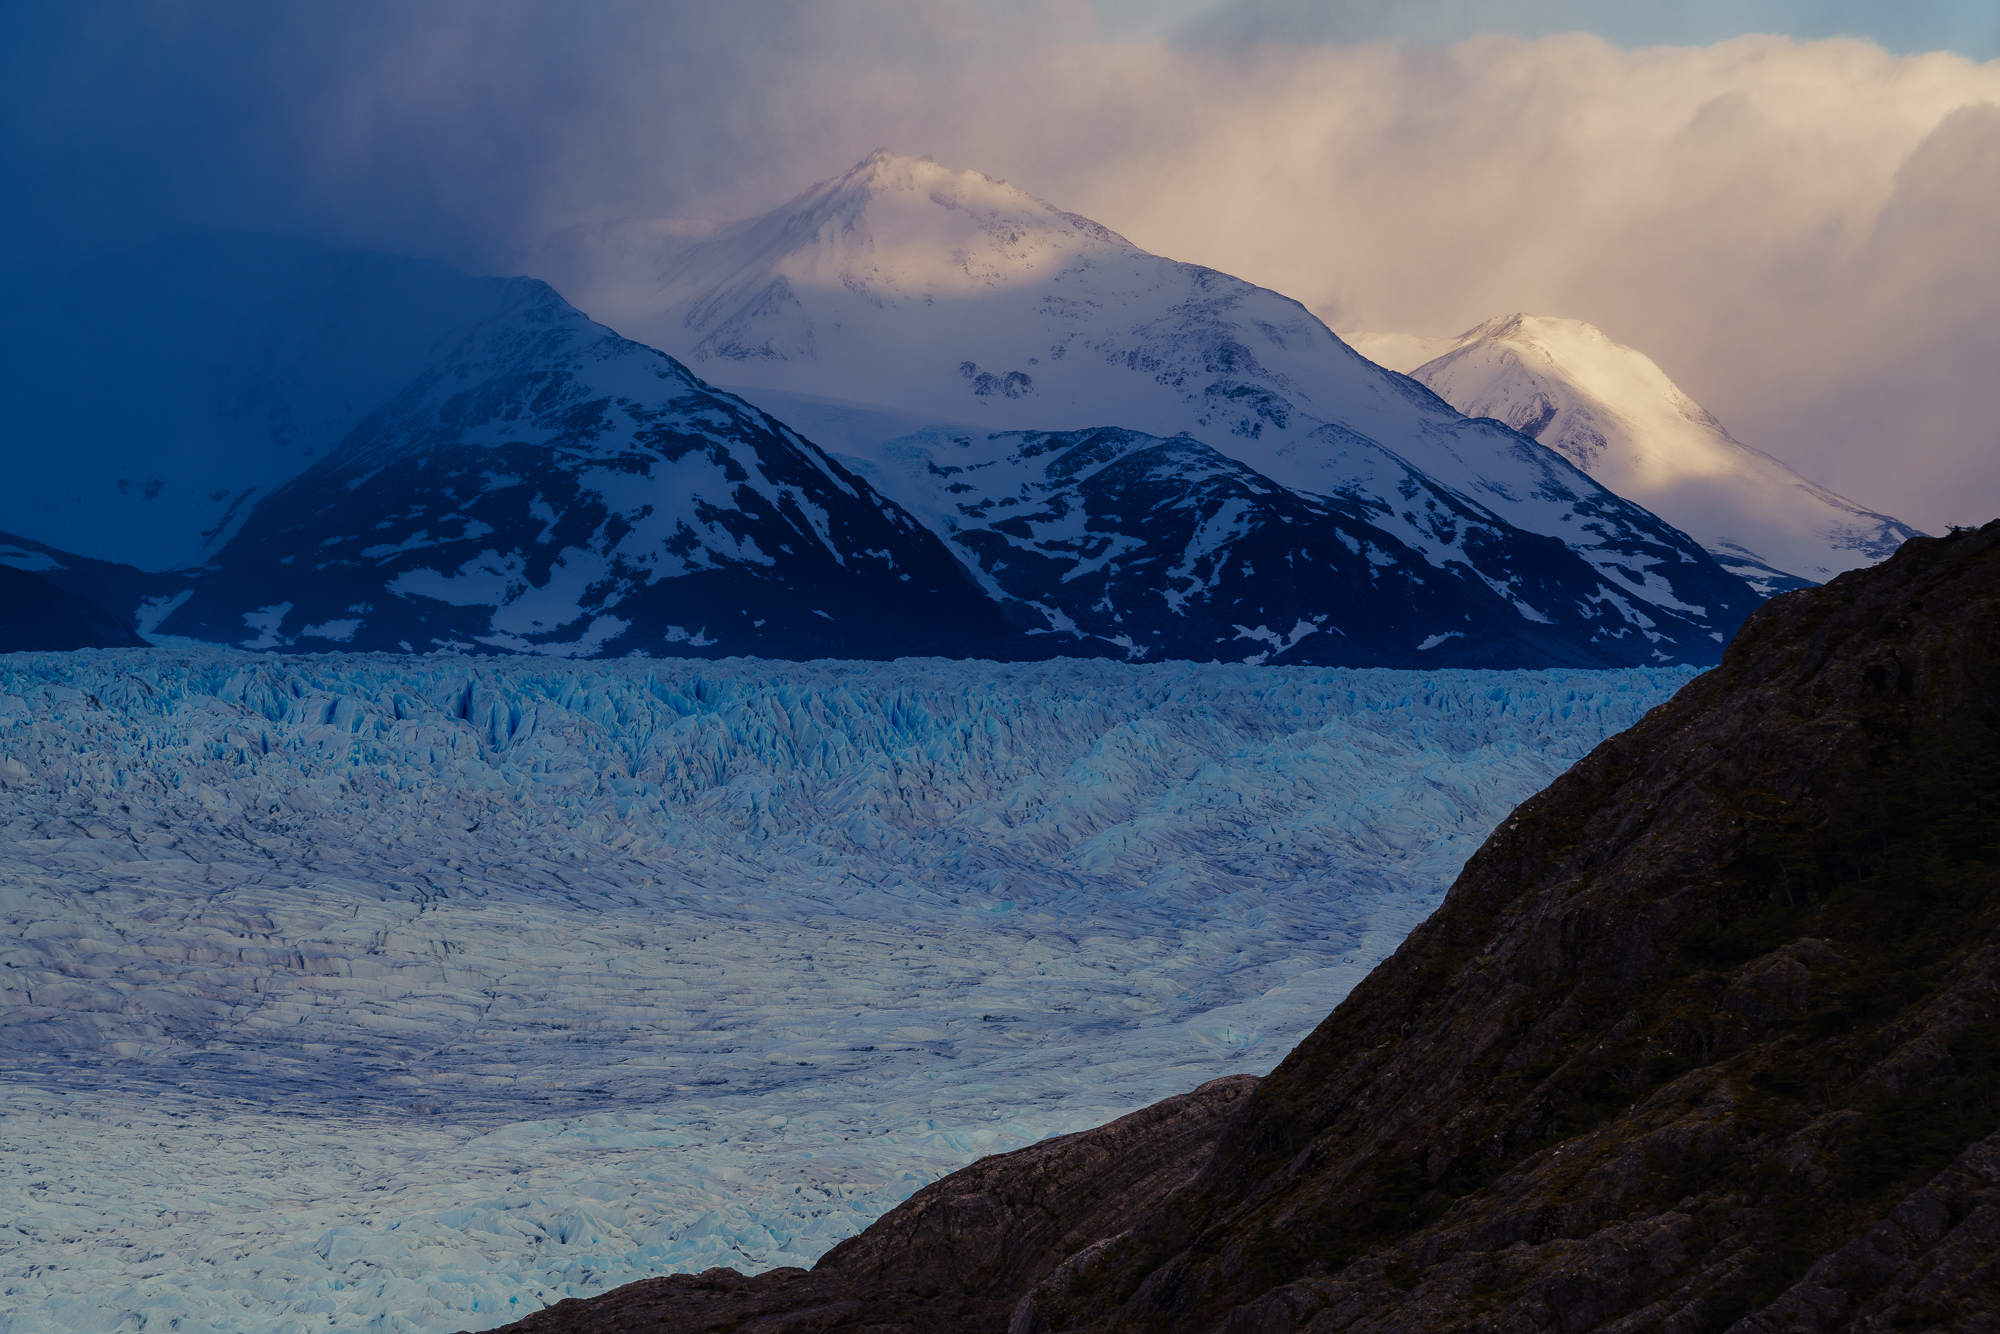
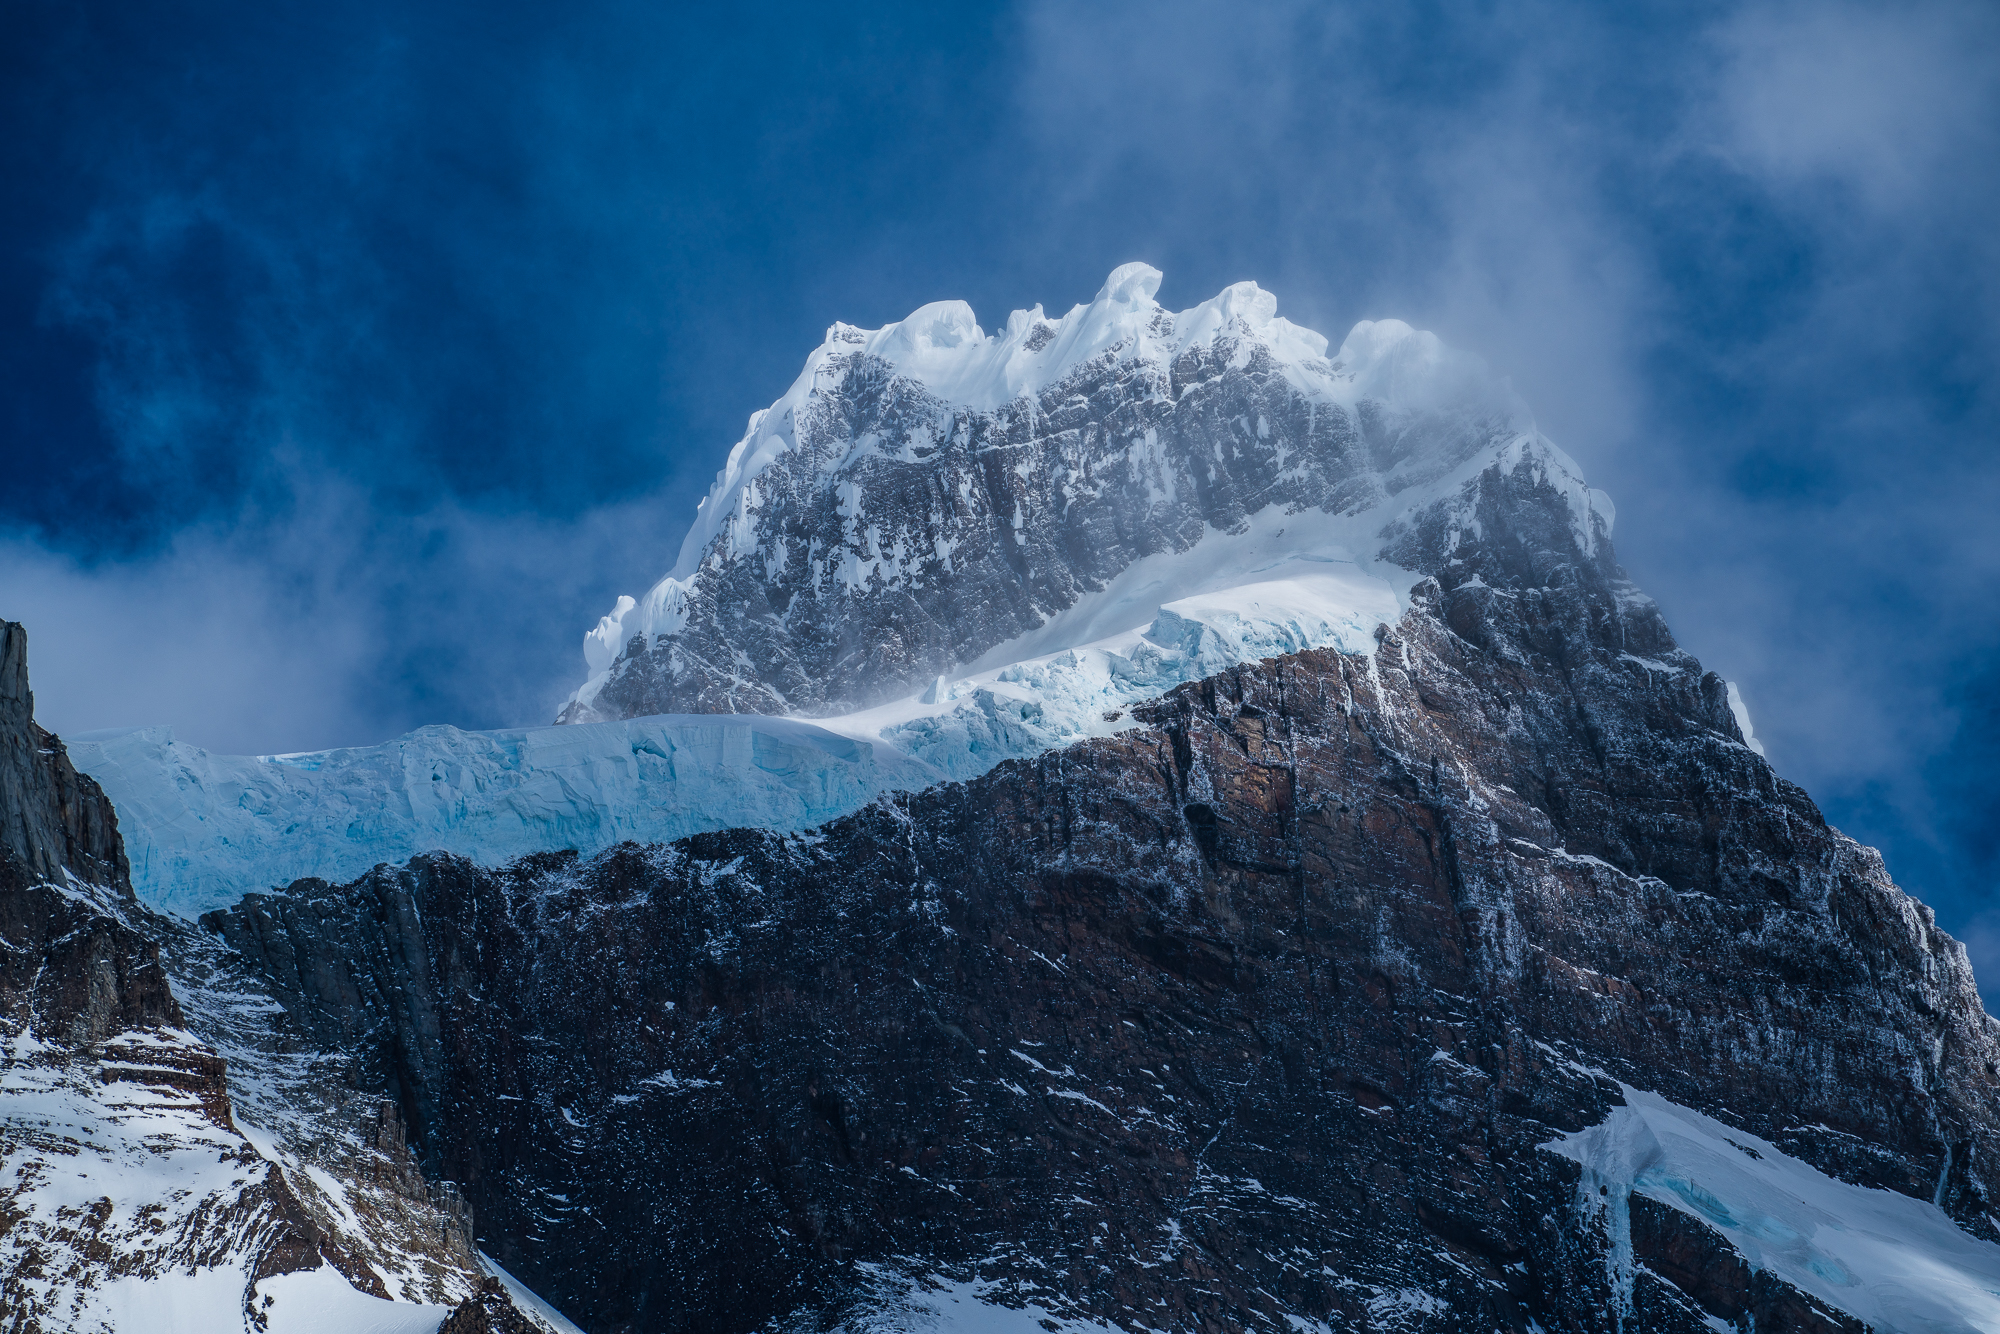
- Hike from Paine Grande to Campamento Grey. This takes roughly 4 hours, there are some steeper parts but the distance is easy to manage. And you get rewarded with spectacular views over glacier Grey! Warning: This part of the trek can be very windy.
- If you still have energy after setting up tents and cooking, put on your hiking boots once again and go explore the different Miradors to glacier Grey, all offer spectacular views over the glacier. If you have not time for that, do it the next morning, before breakfast.
Recommendation Day 2
Our route: Campamento Refugio Grey – Campamento Italiano
Recommended route: the same
- Hike roughly 3.5 hours from Refugio Grey back to Paine Grande, easy distance, more downhill than uphill.
- Take a break at Paine Grande, get some fresh water and use the nice toilets. Campamento Italiano has only latrines.
- Hike another 2.5 hours to Campamento Italiano.
- Upon arrival, set up your tent and enjoy some time down at the river near the campsite, it’s a beautiful spot for a break. (And also for sunrise tomorrow.)
Recommendation Day 3
Our route: Campamento Italiano – Campamento Francés
Recommended route: Campamento Italiano – Campamento Cuernos
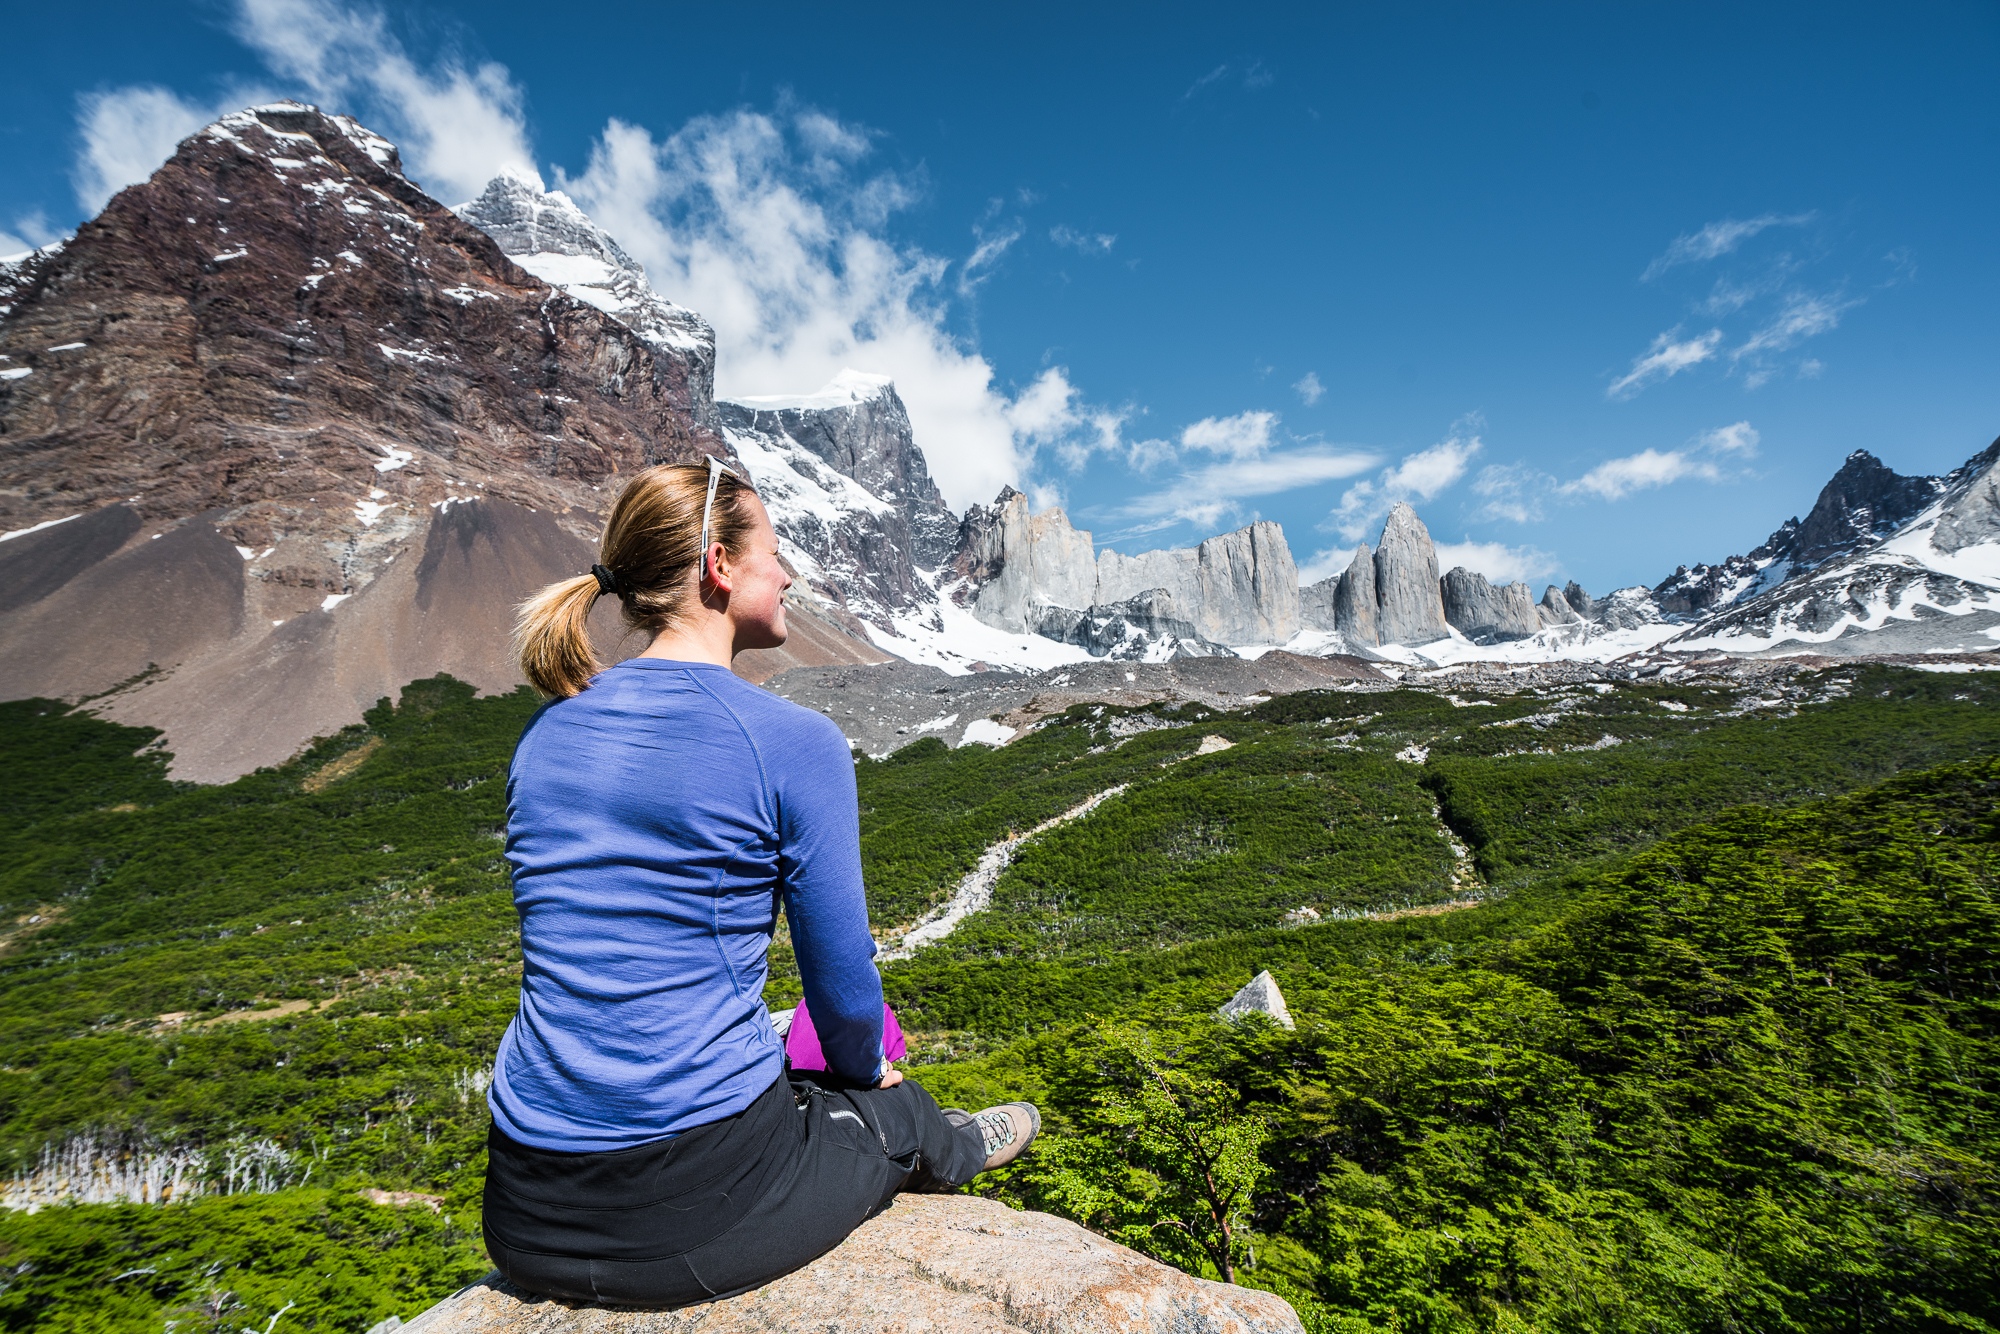
- Get up early (maybe also for sunrise) and hike into Valle Francés until Mirador Británico. Most people from other campsites start this hike around 10 am. Thus, the earlier you start, the more time you have on your own.
- Get your big backpack at Campamento Italiano (leave it there in the morning, most probably no one will take it) and walk to Campamento Cuernos. There is nice infrastructure and the campground is just next to the lake and offers nicer views than campground Francés.
- Side note: If you only manage to get a spot at Campamento Francés, don’t be sad. They have really, really nice showers.

Recommendation Day 4
Our route: Campamento Francés – Campamento Torres Central – Campamento Chileno
Recommended route: Campamento Francés – Campamento Chileno
- Start early in the morning, as it will be a long hike up to Chileno and you have to get a good night’s sleep for the next day.
- We found this was the least interesting hiking day when it comes to scenery. If you feel the same, just keep in mind that the best is yet to come.
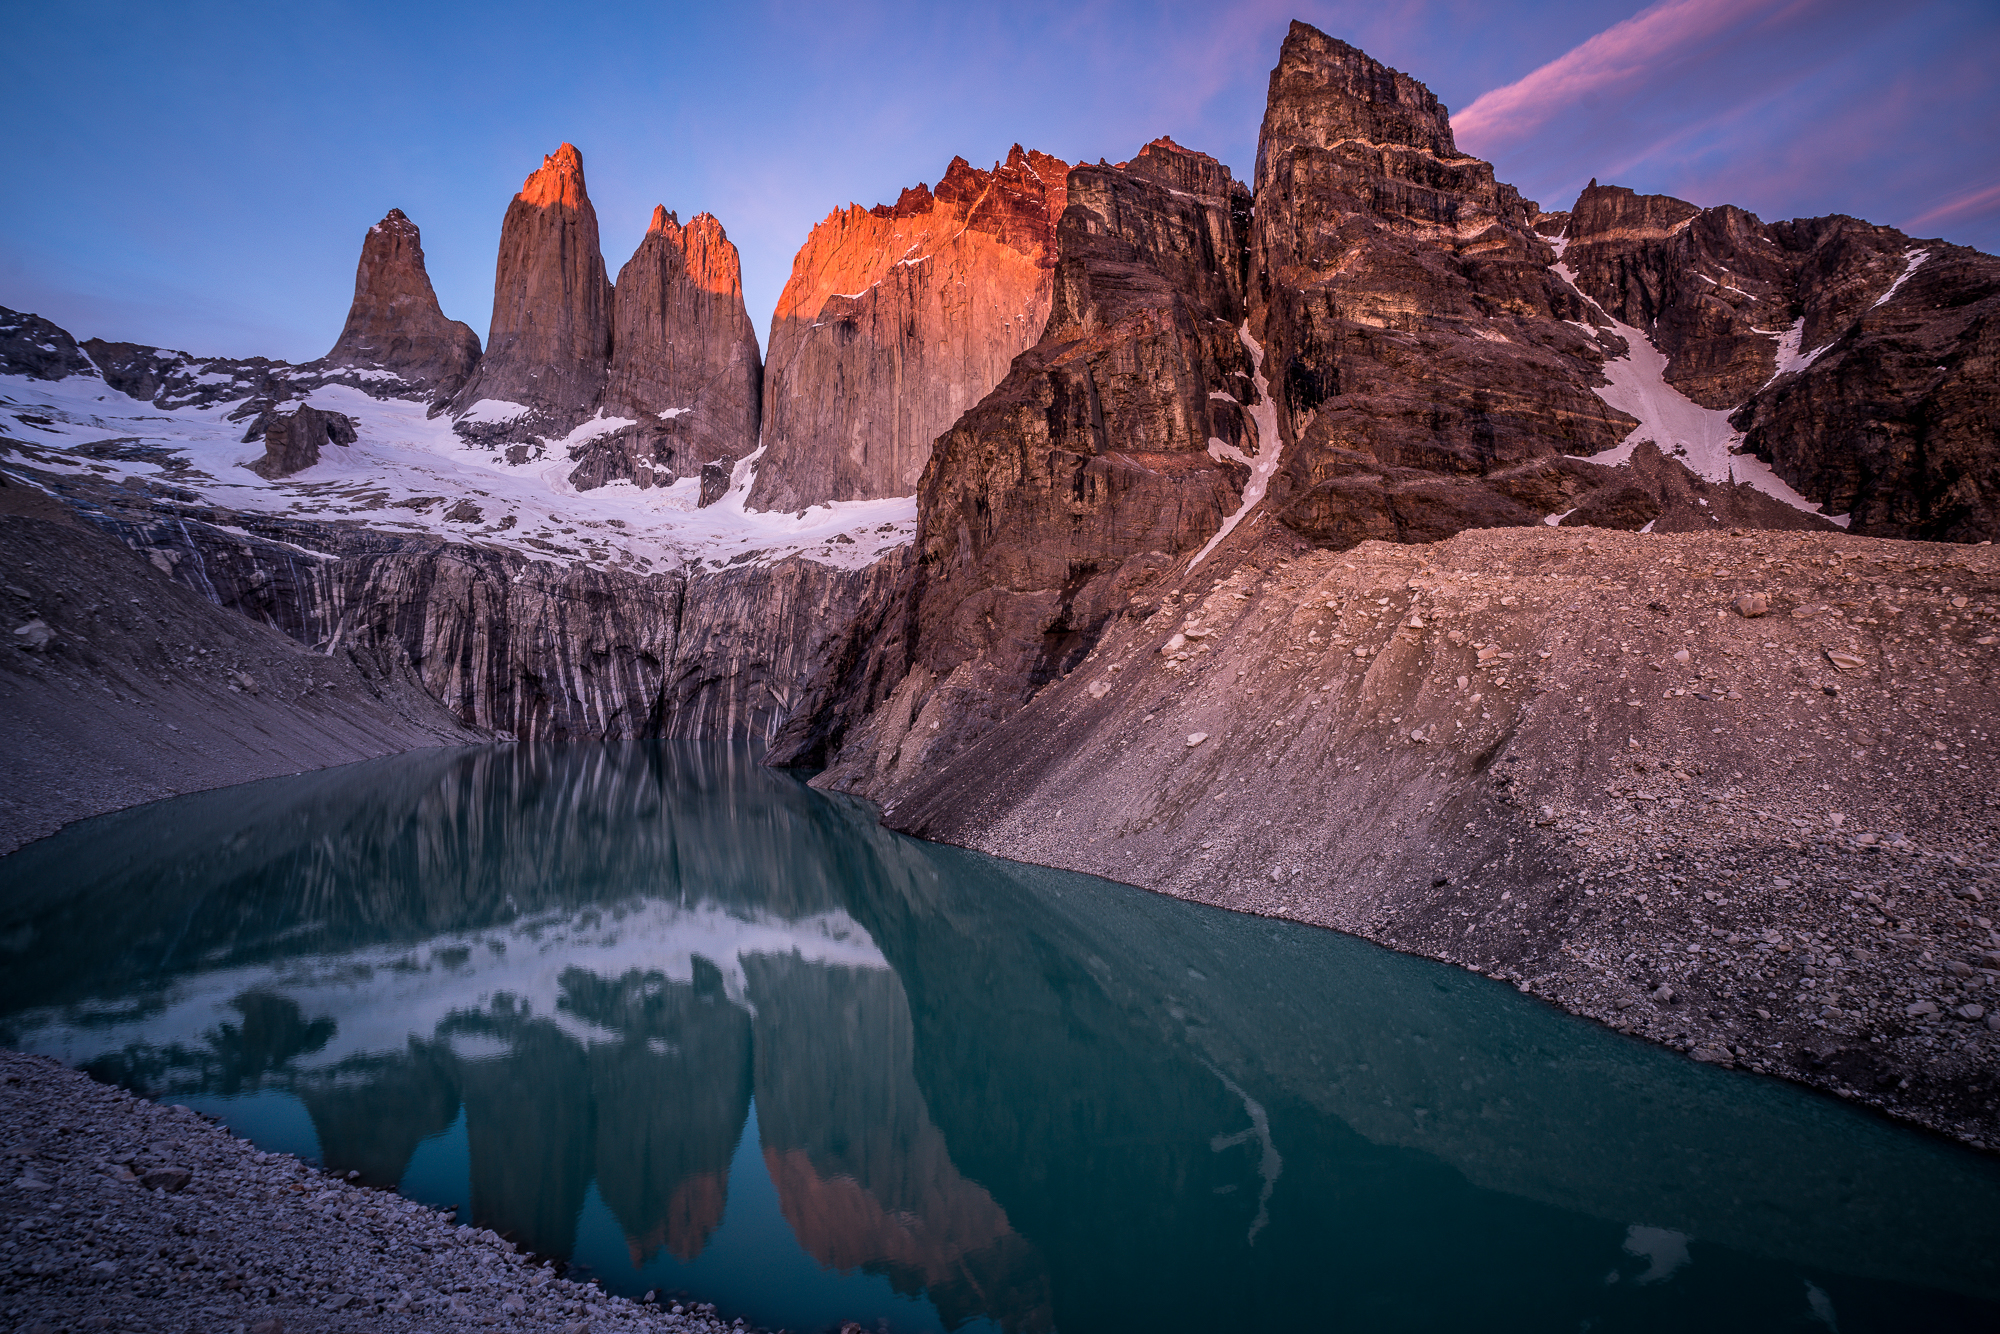
- If you could only reserve at Torres Central instead of Chileno (which describes our initial situation), get up even earlier and try to change your reservation last minute at the Refugio Torre Central. We were lucky and could switch to Chileno in the afternoon, which meant we had to walk some extra kilometers up the mountain. But it is really worthwhile trying as this would allow you to reach the Mirador Base las Torres at sunrise.
- At Chileno, you can’t cook with a stove, also fires are completely prohibited. Therefore, take enough snacks with you to have a proper (cold) dinner. Or bring some soup. At the Chileno mountain hut you get hot water for preparing those kind of soups. You need that energy.
Recommendation Day 5
Our route: Campamento Chileno – Mirador Torres del Paine – Park exit
Recommended route: the same
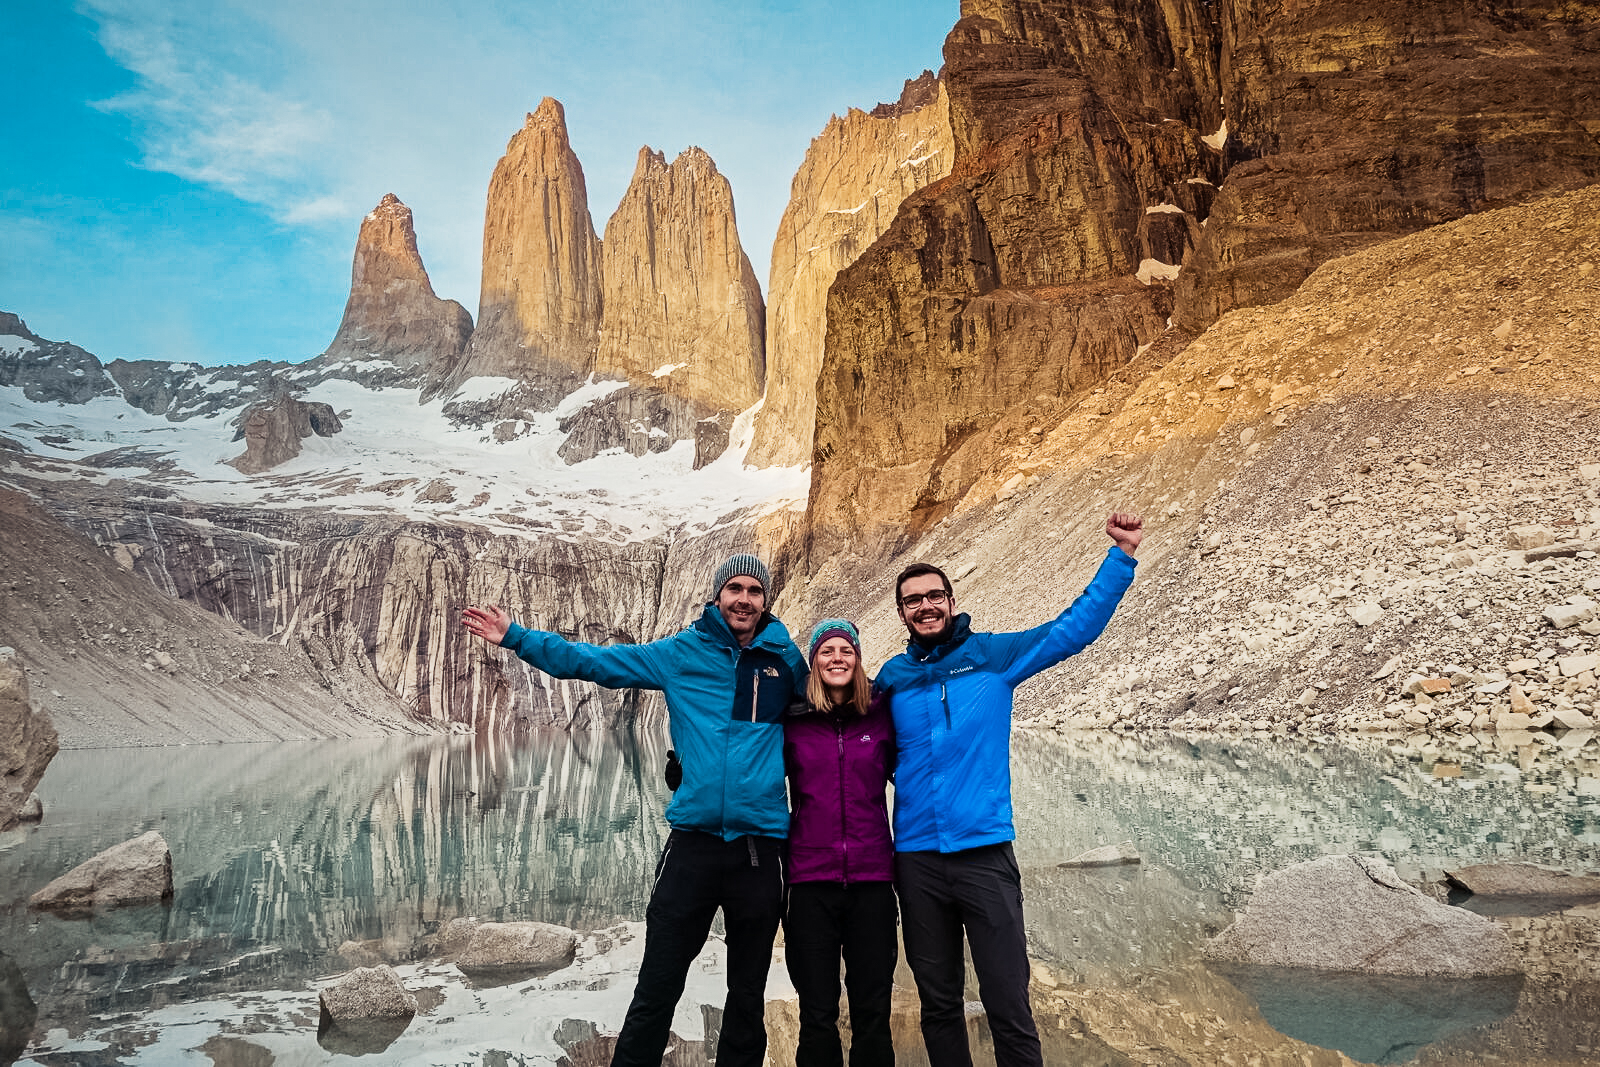
- Start hiking at 3.00 am in order to catch sunrise. It takes roughly 2 hours to hike up to Mirador Base las Torres.
- Layer your cloths and take an extra jacket with you so you don’t get cold at the Mirador when you wait for sunrise.
- Bring your headlamp, as you will walk at least 1 hour in darkness.
- Enjoy sunrise at the Mirador and then, around 7 am, walk back to the camp. Check out is at around 9.30 am so you can pack up your tent and belongings after you return from watching the sunrise.
- Head back to the park exit and take a bus to Puerto Natales at around 2 pm. There is only one bus in the afternoon and one in the evening. Check timetables again before.
5 extra recommendations, just for you
- Ask for help. If you don’t manage to get the perfect campground for your route, ask around in Puerto Natales (CONAF, Vertice and Fantástico Sur have offices there) or at the Refugios directly in the park. With a bit of luck, you can switch your reservations last minute. There are also some local agencies based in Puerto Natales that support you with campgrounds reservations, usually to a bit higher rate. Erratic Rock was really helpful in our case with the reseravations. Erratic Rock also offers a daily orientation session about the treks in the NP. But don’t take their recommendations for granted, they have the tendency to overexaggerate and are not up-to-date.
- Think out of the box. Even if the W- and the O-trek are most popular, a lot of people hike Torres del Paine on an alternative route. You could stay two nights at some campgrounds and explore the valleys around with a lighter backpack. Alternatively, you could do the trek the other way round or beat the standard five days and hike the whole trek in four days.
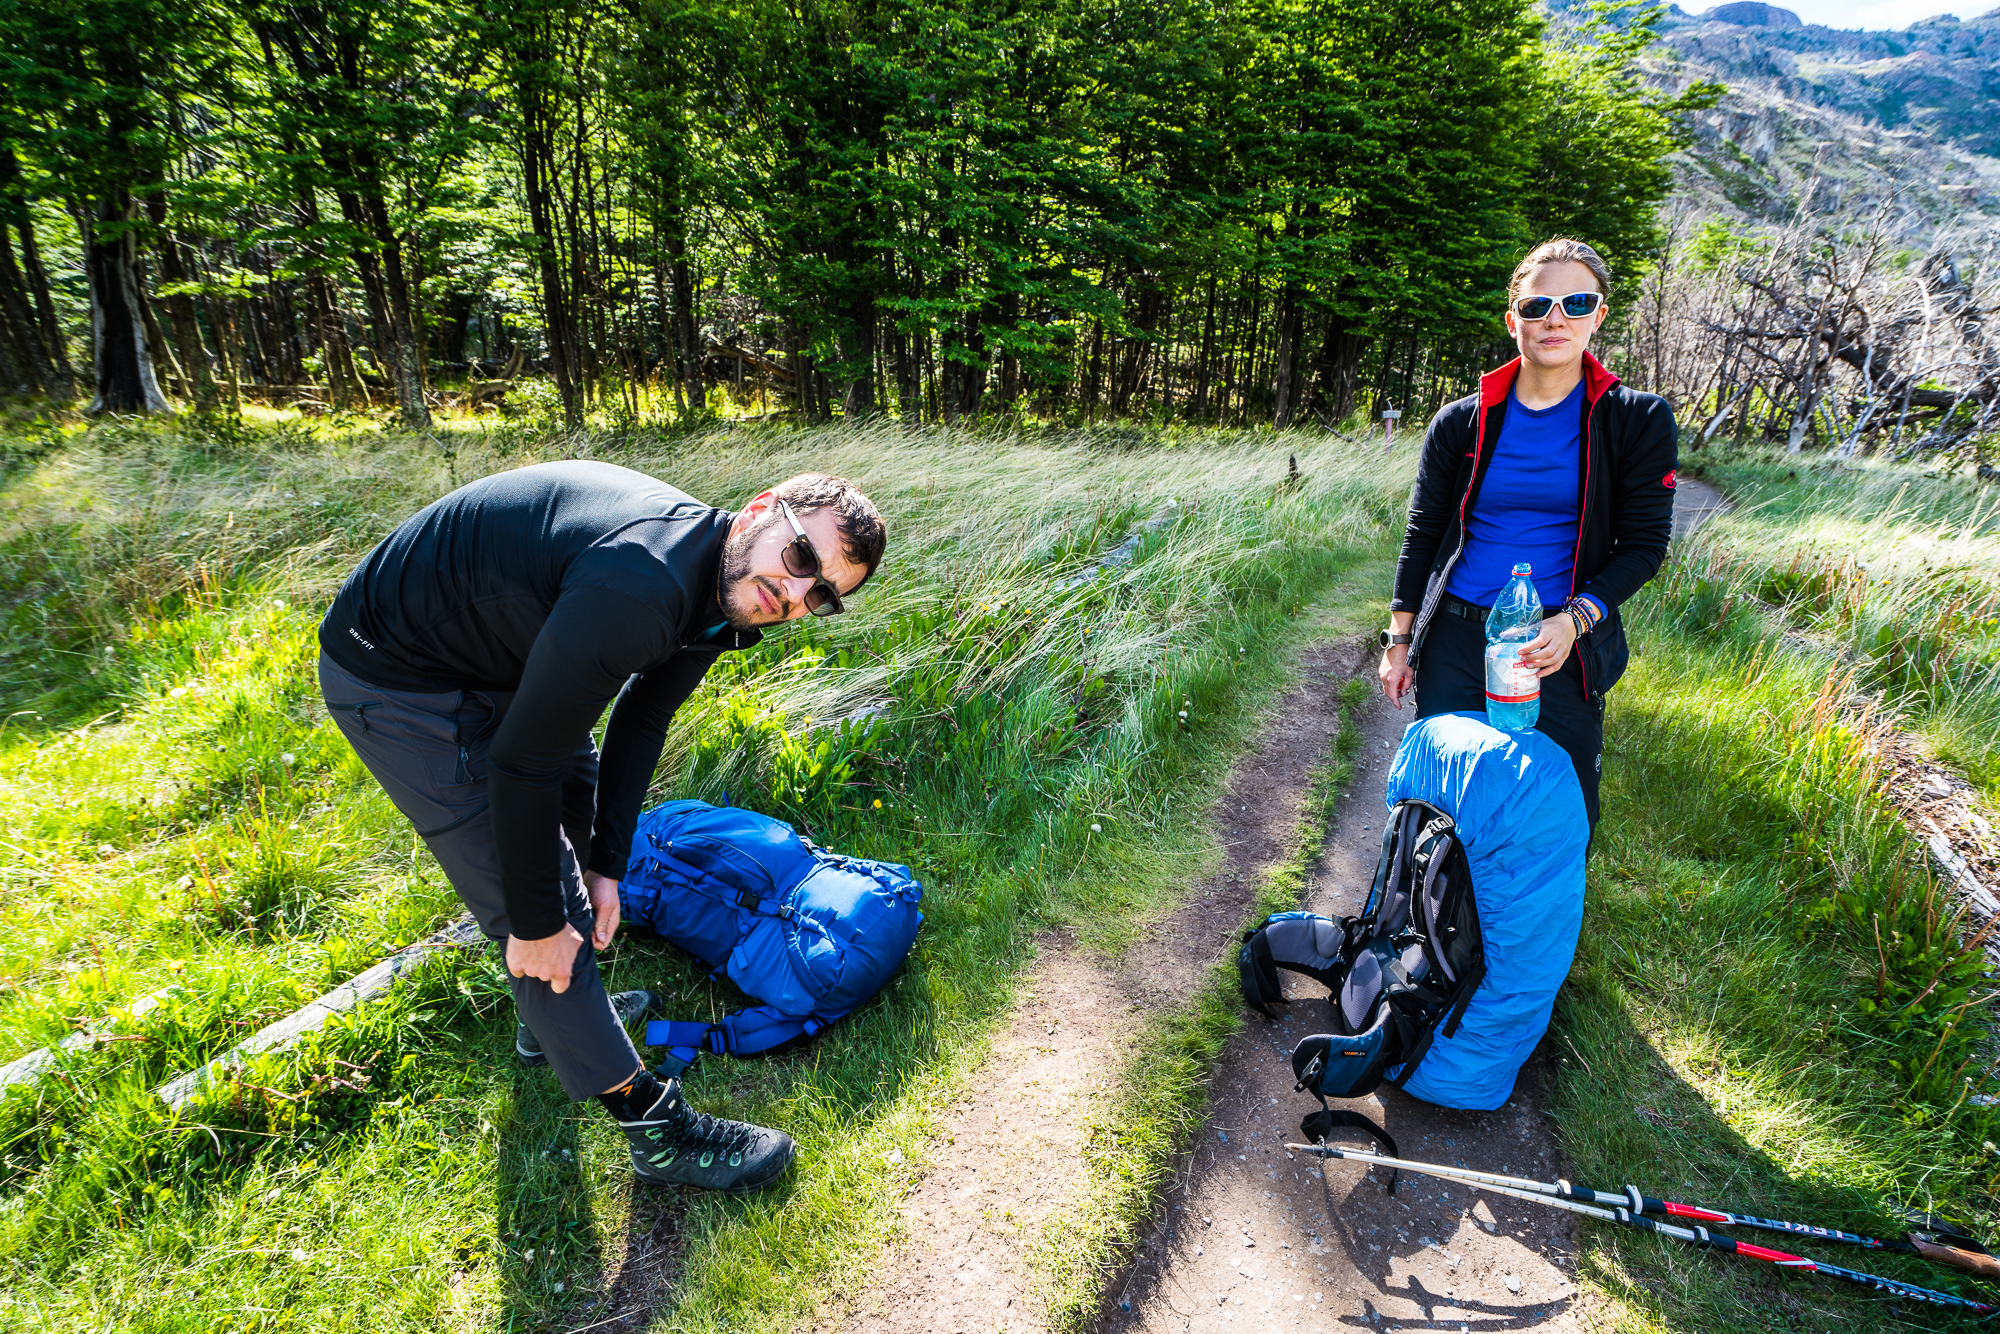
- Keep it light. Don’t pack unnecessary stuff, reduce it to the minimum – only warm cloths, camping and cooking gear, well rationed food, sun protector and a water bottle are necessary. Most campsites have very decent infrastructure, including mini markets that sell snacks or pasta, toilets with toilet paper, soaps for washing dishes, hot water for your thermos – you name it. Some campgrounds are located just next to the Refugios (mountain huts). There, breakfast, lunch and dinner are served. It’s not the cheapest option but you could save some kilos in your backpack and eat out during your hike. Also, on every campground you can get fresh water from the river.
- Beat the wind. Prepare for every weather and layer your cloths. It can be windy, like really, really windy – we had fairly good weather but experienced winds up to more than 100 km/h. Also, it can be rainy, it can be sunny, it can be everything at the same time. Weather in Patagonia seems to be quite crazy. This is a platform that provides accurate forecasts.
- Enjoy the W-trek, or any trek you do in these great surroundings. And even if it rains and the winds are heavy as hell, smile! I just read recently an article how morale influences your physical abilities, check it here (German only).
Final thoughts from happy hikers
Overall, we were very lucky with the weather. We had no rain at all and heavy winds accompanied us only during the first day. The views towards glacier Grey, the hike up to Valle Francés and the sunrise at Base las Torres were definitively the three highlights. Being used to long distance trails, this was by far one of the easiest treks physically. If you really want to push it, we would recommend you doing the O-Trek or Q-Trek. And share with us your experiences.
Our Trek Rating and Résumé
- Technical difficulty: 4/10
- Necessary fitness: 7/10
- Scenery: 10/10
- Wildlife: 5/10
- Fun: 8/10